|
|

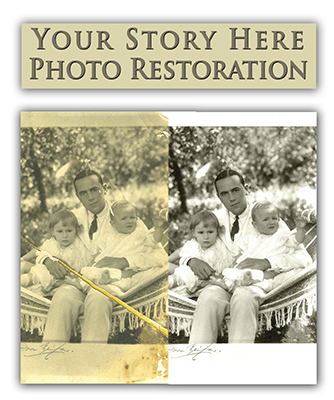
Website article: Simple DIY Tips for Retouching a Digital Photograph By Your Story Here
Maybe you can fix your own photograph...
If it's just a question of giving the image an overall boost (whether you snapped the pics yourself, or scanned them) there are 5 main adjustments you need to make to get them looking like the cat's meow. And you don't need specialist tools like Photoshop CS5 - these simple tips should work with most free or cheap digital image editing programs.
Digital images tend to suffer from the same problems time and time again. And most of those problems have been with us from the days of film. The difference now is that with digital photography, and all the free or cheap digital imaging software, you can achieve a basic level of photo retouching and restoration.
So here are five tips for tip-top shots. It is best to do them, or at least consider them, in the order presented here.
1. Parallel your horizon with your image top border
A shot that just looks wrong is often just crooked. You shot in a hurry, or you were on a boat - whatever - it can easily happen that the people look like they are going to slide out of the picture altogether. The tip here is to rotate your photograph so that the horizon is aligned with the horizontal top or bottom edge of the image. Most programs will allow you to rotate (or "straighten") just a couple of degrees - which is often all that is needed.
2. Cut out all the unnecessary background
It may be that the central interest in the photograph is too far away or two small. (In addition, having aligned and rotated your image, you may find that you have some triangular shaped white spaces around the edges.) This is where you will "crop". Cropping will drag in the edges of the image bringing your subject closer. Avoid putting your subject right in the middle of the photo - best to place them in the imaginary line defined by one of the vertical thirds (this is called the "rule of thirds"). Looks more natural that way.
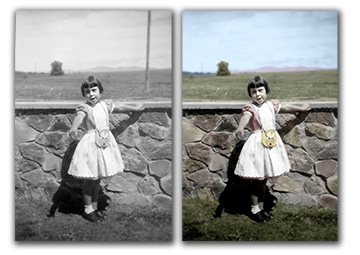
3. Adjust your color saturation and color temperature/tint
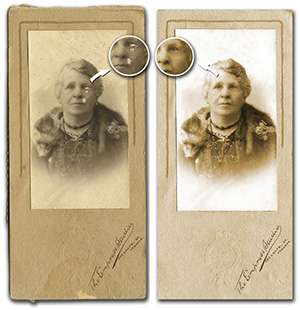
Color saturation is the amount of color intensity in an image. Too much and it looks garish and cheap, not enough and the thing looks anemic. (If you are restoring or retouching old photos which you have scanned, fading is a very common problem.) Adjusting your color saturation will bring things back into the realm of nature. Keep in mind that the way your computer renders the digital image color information is different to the way your printer renders it. Keep in mind also that your photograph will look different depending on what brand and what type of paper you are using.
The other adjustment that a lot of image software provides is "color temperature" or color tint. Sometimes photographs require retouching or restoration because they have a distinct blue or yellow cast and this slider can bring the image back where it should be. The tip with color adjustments is to adjust the color on screen to your liking, print the image, then if any changes are need (e.g. the photo looks washed out) you can over-adjust in the program.
4. Expand black and white contrast
There is an indefinable quality to a great photograph. It just seems to "pop" - it has real eyeball grabbing impact. In many cases, the reason is that the image has a full tonal range. In other words, it has true whites and true blacks and the normal range of tones in between. The most common reason for a washed out photograph requiring retouching or restoration is that the blacks are dark gray and the whites are muddy. So, you must adjust the contrast. Don't be scared to "go long" with this one - really boost the contrast and see how it prints. Adjust down if necessary.
5. Sharpen the image
Digital photographs sometimes look a little soft or blurry. You may not see it on your computer monitor, but it is often noticeable in the print. Now there is a little understood and seldom used effect or adjustment called "sharpening". What this does is increase the contrast between light and dark pixels in your image. The result is that the photo looks like it is more in focus. Hard to believe? Try for yourself!
There really is no limit to what you can do with digital editing and photo retouching and restoration. And once you have mastered these 5 steps, you will be ready to think about more advanced digital manipulation and the production of complex images that combine layers and text.
If it's just a question of giving the image an overall boost (whether you snapped the pics yourself, or scanned them) there are 5 main adjustments you need to make to get them looking like the cat's meow. And you don't need specialist tools like Photoshop CS5 - these simple tips should work with most free or cheap digital image editing programs.
Digital images tend to suffer from the same problems time and time again. And most of those problems have been with us from the days of film. The difference now is that with digital photography, and all the free or cheap digital imaging software, you can achieve a basic level of photo retouching and restoration.
So here are five tips for tip-top shots. It is best to do them, or at least consider them, in the order presented here.
1. Parallel your horizon with your image top border
A shot that just looks wrong is often just crooked. You shot in a hurry, or you were on a boat - whatever - it can easily happen that the people look like they are going to slide out of the picture altogether. The tip here is to rotate your photograph so that the horizon is aligned with the horizontal top or bottom edge of the image. Most programs will allow you to rotate (or "straighten") just a couple of degrees - which is often all that is needed.
2. Cut out all the unnecessary background
It may be that the central interest in the photograph is too far away or two small. (In addition, having aligned and rotated your image, you may find that you have some triangular shaped white spaces around the edges.) This is where you will "crop". Cropping will drag in the edges of the image bringing your subject closer. Avoid putting your subject right in the middle of the photo - best to place them in the imaginary line defined by one of the vertical thirds (this is called the "rule of thirds"). Looks more natural that way.
3. Adjust your color saturation and color temperature/tint
Color saturation is the amount of color intensity in an image. Too much and it looks garish and cheap, not enough and the thing looks anemic. (If you are restoring or retouching old photos which you have scanned, fading is a very common problem.) Adjusting your color saturation will bring things back into the realm of nature. Keep in mind that the way your computer renders the digital image color information is different to the way your printer renders it. Keep in mind also that your photograph will look different depending on what brand and what type of paper you are using.
The other adjustment that a lot of image software provides is "color temperature" or color tint. Sometimes photographs require retouching or restoration because they have a distinct blue or yellow cast and this slider can bring the image back where it should be. The tip with color adjustments is to adjust the color on screen to your liking, print the image, then if any changes are need (e.g. the photo looks washed out) you can over-adjust in the program.
4. Expand black and white contrast
There is an indefinable quality to a great photograph. It just seems to "pop" - it has real eyeball grabbing impact. In many cases, the reason is that the image has a full tonal range. In other words, it has true whites and true blacks and the normal range of tones in between. The most common reason for a washed out photograph requiring retouching or restoration is that the blacks are dark gray and the whites are muddy. So, you must adjust the contrast. Don't be scared to "go long" with this one - really boost the contrast and see how it prints. Adjust down if necessary.
5. Sharpen the image
Digital photographs sometimes look a little soft or blurry. You may not see it on your computer monitor, but it is often noticeable in the print. Now there is a little understood and seldom used effect or adjustment called "sharpening". What this does is increase the contrast between light and dark pixels in your image. The result is that the photo looks like it is more in focus. Hard to believe? Try for yourself!
There really is no limit to what you can do with digital editing and photo retouching and restoration. And once you have mastered these 5 steps, you will be ready to think about more advanced digital manipulation and the production of complex images that combine layers and text.